Showing posts with label sewing. Show all posts

Thursday, May 9, 2013

Alligator Handbag

 I finally finished my first attempt at a purse.  I fell in love with this idea over at Sew4Home last month.  I've never done anything like this, and had no idea how it would turn out.  I'm a bit of a purse... snob, so I knew it wouldn't become my new go-to-favorite-bag, but I thought it was cute, and I have nothing like this.  And it looked kind of fun. I had trouble getting handles for it, they finally showed up this week & I could finish putting it together. 


I'm happy with it- I think it turned out cute.  Maybe I'll carry it to brunch on Sunday!  


Wednesday, April 24, 2013

The Outdoor Cushion Project


I've been dying to show you my brand-new-made-by-me patio cushions but it seems Mother Nature doesn't think you need to see them in action.  Our poor patio set--  ten years old, not ready to be tossed but not quite worthy of hundreds of dollars of new cushions - won't know how to feel when the weather finally does turn warm and gets to be all pretty again!  I also made new cushions for our three piece wicker set.  It didn't really need them, but they wouldn't have matched, and I knew that would bug me.

Outdoor fabric from Fabric.com...about $8/yd  and two spools of thread- all for less than $70.  I was very, very fortunate in that we were able to re-use the foam from the old cushions.  Buying new foam would have been the deal breaker.  Outdoor foam is really expensive.  I didn't price it out all the way, but would have cost an easy $150.  Our original cushions had a bottom and a back.  I wasn't really feeling like making a full back piece, so I used the batting from the old backs, folded it in half, and made small pillows for the chairs.

So, all in all...  6 chair bottoms, 6 chair pillows, and 3 pads  for the wicker set.  I used these instructions from Sew4Home as my guide. I did NOT make the piping.  That seemed... exhausting.  It was not a hard project, at all, but took some time.

Hopefully, SOON, we can take our cushions outside and enjoy them!  I think they'll go nicely with a bottle of chardonnay, don't you?


Saturday, April 20, 2013

I DID IT! I REALLY DID IT!


You may have heard me say things lately like "I'm going to make a pencil skirt", and 'I can put a zipper in, no problem'.  If I'm going to be truthful, I figured I would TRY to make a skirt and throw it away because it would never fit and would look terrible.

HA!!  
my invented kick pleat pattern

It never, ever should have worked.  I started out like I knew what I was doing (let me say here that I have known, in the past, how to do this - my mother taught me to sew - and sew well - when I was younger, but I haven't made actual clothes for years.  And not usually without some help).  I bought a pattern, only to realize it didn't have a kick pleat in the back.  And thinking I actually had a clue, I just put one in anyway (HERE is the website I used for the kick pleat.)   This lead to me basically re-vamping the entire pattern - I had to change the seams from 2 side seams to add a back seam to accommodate the pleat, and then put the zipper in the back seam instead of the side.  That meant the whole facing had to be re-worked.  
the pleat, all done!!

And it was just a tad to small, so I had to tear out all the seams & make smaller seam allowances.

My zipper isn't great.  I need to practice some zipper work....  and then I even had to hem it.  By hand. I knew the fabric wasn't the best choice - it's a little light weight & could use a lining, but it'll be fine for wearing around the house this summer. 

is it perfect?  no.  do I like it?  YES!  I will absolutely be making another one!  


Wednesday, April 3, 2013

Another Use for My Burlap - a Table Runner!


You know I am having a little spring time crush on burlap...   and I love the table runner I put together.   I'd love it more if I'd made it about 5 inches longer, but that's what happens when I'm being just a tiny bit, um... lazy.  I did think, before sewing the lining onto the back of it- "Hey, Karen - you really should run downstairs and make sure it fits right."  

I didn't, and it's just a little too short.  Which is ok for a few reasons - we plan on replacing this table with a longer, farmhouse style table this summer.  Er, at least, as soon as I can convince my husband to build me one.   And I do have enough fabric left to do another one.  I think I will make a second runner, without lining it, and fray the edges.  

If you are wanting to make a table runner of your own, this link will give you a quick tutorial on making a lined runner.  You could also just press up a hem and glue it down- it won't last forever but it may last as long as you'd like it to!  I did prewash my fabric (burlap & backing) to avoid shrinkage later.  and to get some of the burlap smell off the burlap.  


Wednesday, March 13, 2013

I LOVE this Fabric!!

As soon as I saw this Nancy Drew themed fabric (by Moda, found here), I knew I had to own it.  Of course, I had no idea what I would do it it.  It would make a great tote bag  or a cover for your Kindle, or lots of things like that...  but I decided to make a cover for my sewing machine.

Yes, I realize there is nothing that screams 'sewing room' about this fabric, but it's my sewing room & craft room, and I can do what ever I want to.

Yes, my sewing machine is old.  As old as I am.  But it works pretty well, and until I can actually justify getting a new one, I may as well treat this one nicely.


I used a tutorial by the Crafty Gemini (here).  Except for the fact I hate using iron-on fleece, it turned out cute. I really wanted to add a row of yellow pompom fringe to the bottom, but the only fringe I found was being sold on clearance by the bolt.  I really, really didn't need $9 and 10 yards of yellow pompom fringe.


Monday, March 11, 2013

Ironing Board Diva Part 2


Inspired by a Sew4Home project, I set out to make a little caddy to hang from my ironing board to hold stuff.  Since I didn't really want to follow directions, I just started by cutting & laying it out.  If you want real instructions, you can start here.  


I used an iron-on fleece for the batting.  If you think it looks crooked, it is.  On purpose.  I'm completely nuts and use my ironing board backward.  I like to use the big square end for stuff, and leave the pointy end alone.  so- I needed this to hang at the pointy end.  Which meant in order for my pocket to hang straight, I had to make it crooked.  Get it?  


I made a little pincushion for the top- if I'd been thinking ahead, I'd have sewn velcro to it before I put it together, but I never work like that.  So instead it got this cute rickrack to hold it down.  It also leaves the pincushion removable, so that's not so bad.


Finally, I needed a little thread catcher.  I'm sure there are all kinds of ways to do this.  I ended up cutting 2 squares, 9x9 and sewing right sides together.  Then I cut a little 3" square of cardboard, laying it in the middle,  and pressing creases all around.  I sort of just ad-libbed it, folding all the ends together & stitching across.  It turned out cute, was very simple, and I think I'll make a few more.  

All in all- a quick project.  Especially considering I was making it up as I went!


Thursday, February 14, 2013

Shopping Bag Hack (or, Best Idea EVER!)


I don't know about you, but I end up at the grocery store with a pile of shopping bags, my purse, and my list, all stacked in the front part of the shopping cart.  Typically my list falls to the ground somewhere around aisle 2, leaving me with no idea what I came in to buy.  So when I saw these on Sew4Home, my first thought was 'BRILLIANT!", and off I went to buy the stuff to put them together.

The instructions tell you how to double up the bags and even add an inside pocket.  I was just wanting the vinyl pocket on the outside to hold lists & coupons, so I skipped all the other steps.  I bought a medium weight vinyl ($4.99/yd + coupon!) and found a clearance fabric that matched the bags without being too annoying.  I now own a lot of vinyl, by the way.


Vinyl needs a little love if you want to sew on it - I used masking tape to hold it in place (don't sew over the tape) and wax paper over the whole thing.


 Really, how fun is this?!  I'm excited to go to the store now.  well, maybe not excited...


Wednesday, February 13, 2013

Ironing Board Diva


Yes, I really just did this.  I re-covered my boring, ugly ironing board. And now it's FABULOUS.

I've just discovered Sew4Home.com, a completely addicting and inspiring website full of great ideas and tutorials.  This is the tutorial/pattern I used for my cover, except I added the stripe at the pointy end instead of the straight end of my board.  Basically, you just need to add enough around the edges for the depth, a hem, and a casing.  I used white cording, the pattern uses ribbon.  I wanted to get a solid knot when I tied it, and was afraid the ribbon may not allow me to do that.

I bought a new ironing board pad at Joann's- using my 40% off coupon, of course (I think it was $9 originally).  And, WOW, check out the difference between the old and new pad!


The annoying part of this project is that you have to take apart your ironing board to trace the pattern, then put it back together to press your fabric.

I love this Michael Miller Dress Forms  fabric (from Fabric.com), and the pink is from Hobby Lobby.  My mom will be proud; I rinsed & dried the pink fabric before using it.  I was a little concerned it could fade & transfer onto whatever I may be ironing.  Which would be bad.  

All in all, it took about an hour to put together.  And it's SO CUTE!!  
see my messy craft room?


Thursday, January 31, 2013

Storage Gone Fabulous

So, I love my Thirty-One bags.  Cute, useful, all that jazz.  As I'm working on re-organizing my craft room, I was trying to come up with some other great storage options.  Sure, the Dollar Store has some brightly colored plastic bins for a buck, or I could splurge & order some more utility bins from Thirty-One, or use any of the 20 baskets from my stash, but then I saw some adorable round bins made from fabric.  BAM.

A quick trip to Hobby Lobby found these gorgeous babies
None of which match anything in my house, but that's ok.  

and now I have these!
I even added a pocket to hold crochet hooks & scissors. 
(I didn't even end up with the pocket upside down, which is normally how I roll)

I'm super happy with them, considering the fact it's been a long time since I sewed round things together, and that I burned my thumb with steam from my iron.  yeah.  really.  And I'm really loving this gray/yellow pattern.  Trying to think how I can use it in my house...   hhhmmmmmm.  

Friday, January 25, 2013

Little Camera Case

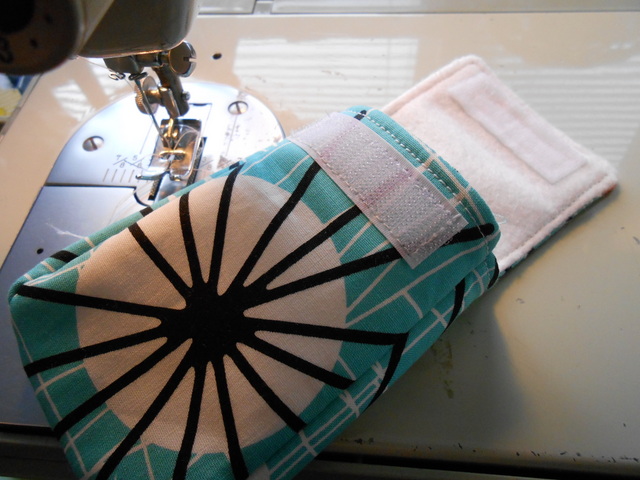
So, I was inspired by Pinterest (wait, how many sentences start that way?)  the other day, and made a little case for my camera.  Yes, I have a camera.  And I like to carry it in my purse.  Hence the need for a Little Camera Case.  Turned out cute, right?  and lined with felt, so soft, too.